See our latest projects and be updated with recent news and features
happening in the world of pneumatic conveying, materials handling
and industrial vacuum systems.
Dust collector filter maintenance is one of the most important processes in ensuring dust collector system longevity and productivity. This maintenance covers other dust collector filter elements, such bags and cartridges. These elements require regular maintenance and are often cleaned to extend their operational life. There are specific guidelines on how best to maintain and clean these filter elements. We have put together a simple and easy-to-read best practice list to help ensure you do this essential work correctly.

Dust collector filter maintenance best practices including bags and cartridges
The famous quote, "Do not judge the book by its cover" is true, even with dust collector filters, bags and cartridges. A dirty-looking filter element may still have plenty of life left; however, only an expert dust collector service technician can clearly see this.
Find out more if are looking for a dust collector service technician or if you would like to find out about our dust collector services or call us 1300721458.

Tip#1 - Don't underestimate the life of the your filter element by how it looks
If ever you see someone tapping on a dust collector filter, bag and cartridge, you may be sure they are not a trained technician. Hitting your filter element to knock out dust damages the structure of the filter element. It also puts the dust collector engine at risk from dust ingestion. Moreover, tapping will never release deeply-embedded dust and dirt within the filter elements.
It is always better and safer to let expert technicians do the cleaning for you with proper equipment. Otherwise, change to a new filter, bag and cartridge to ensure maximum efficiency. Consider engaging a dust collector service technician or look into what a contractor can offer in supplying dust collector services.

Tip#2 - Never hit a filter in an attempt to clean it
When inspecting a filter element, check if the dust collector requires any new gaskets. Replace worn or damaged gaskets with a new one right away when changing your filter elements. There is no sense risking damage to the dust collector by persisting with worn or damaged gaskets when they are generally inexpensive.
Prevention is always better than cure. Replace your gasket according to service instructions. This will help you avoid unwanted downtime due to equipment breakdown. If you don’t have the time for making your dust collector filter maintenance routine thorough, consider engaging a dust collector service technician.

Tip#3 - Immediately replace a worn or damaged gaskets
Many filters, bags and cartridges look almost identical. Every dust collector, however, has unique filter element specifications. A slight difference in size, or some other property, can dramatically prevent a good seal or affect airflow.
Order filter elements from a supplier that can be relied upon to give sound and correct advice. You should only need to give the model number of your dust collector system. Suppliers that have a comprehensive range of
dust collector filters, bags and cartridges will often have well-experienced dust collector service technicians who can install it for you onsite. That way you know you will get the right one, and your dust collector will be inspected at the same time.

Tip#4 Never substitute one filter with one that has a different model number
An air leak between filter elements and its baghouse, or any connecting ducting, will make a direct path for dust and dirt to get into the system engine. These leaks need to be fixed immediately. Include in your inspection checklist checking for air leaks, to maximise the longevity and efficiency of your dust collector.
Reduce your costs by finding a reliable partner who provides a thorough dust collector maintenance service. Consider a provider whose technicians can install transition hose and flexible duct.
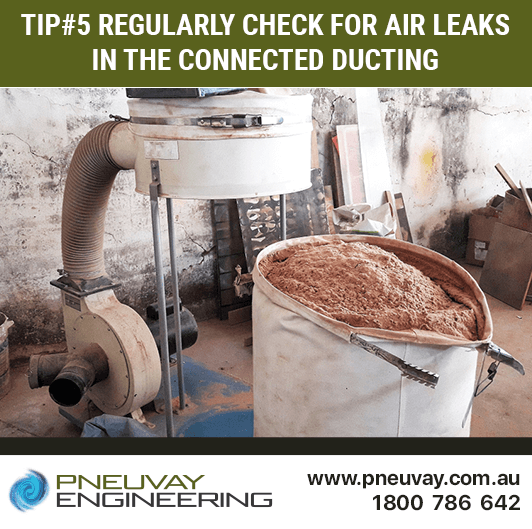
Tip#5 - Regularly check for air leaks in the all connected ducting
New dust collector filters, bags and cartridges are ineffective if the dust collector housing around the elements is damaged. Visually inspect the dust collector housing before and after replacing any filter elements, to ensure the structural integrity has not been compromised.
Choose dust collector service technicians who put in the time and effort to replace filter elements on your system without unnecessarily rushing and risking damaging any housing.

Tip#6 - Check for damage to the dust collector housing during filter replacement
Identify and report any faulty inlet hoods and get them repaired immediately. Inspect and tighten all related components, such as clamps, elbows and connections. Ensure they are secure and not corroded, and have no visible holes or leaks. Replace damaged components immediately.
Hire dust collector service technicians that have a quick callout response time and take care of your dust collector system as if it was their own. Study how they perform their dust collector inspection and maintenance routine and verify how conscientious they are with details. Thorough maintenance routines that include checking the intake hoods and related components will ultimately extend the life of your dust collector.

Tip#7 - Check any intake hoods and pre-cleaner devices during maintenance
It can be tempting to inspect your filter, bag and cartridge every once in a while. Removing a filter element from its housing, just to inspect, is not, however, recommended. Ridges of dirt on the gasket sealing surface can easily drop onto the clean filter element side when the gasket is released.
Install a differential pressure or magnehelic gauge to easily monitor the performance of the dust collector system. You'll be surprised at how much time and cost savings this will bring to your operation by being able to check at a glance if the filter is ready for cleaning or alert to some other issue. Learn more about the advantages of a magnehelic gauge.

Tip#8 - Install differential pressure or magnehelic gauge so you don't need remove a filter element to inspect
Put everything you do and when you put it on file. List all the repairs, adjustments and replacements you apply to the dust collector system. Indicate when your next filter element cleaning or replacement should happen. Note anything unusual to track if it progresses in an issue later on.
Place on your dust collector machine an inspection folder that provides notes on when it was inspected and maintained. Include a checklist to ensure all inspection items on your dust collector have been carefully looked at.

Tip#9 - Record all dust collector filter maintenance actions taken in your service records
Our service department offers a comprehensive dust collector filter maintenance and cleaning service. Reduce your maintenance costs. Call us on 1800786 642 to find out what is best for you and your situation. We are happy to visit you onsite if necessary and recommend the most cost effective solution for your needs. Contact us online and schedule an appointment with us. Or feel free to contact us on Facebook.
Get social with us and see the latest news items from:
Pneuvay Engineering is proud to announce we are the official sole agent for Vortex Australia.
This is a great development for the Australian pneumatic conveying industry.
Read on for more.
Pipe and Tube Compression Couplings
Industrial Dust Collectors Systems
Dust Collectors Filters, Cartridges and Bags


